®
FLOOD TEST
The Benefits of Flood Testing in Waterproofing:
ENSURING WATER-TIGHT INTEGRITY
When it comes to waterproofing, ensuring water-tight integrity is of paramount importance. One of the most effective ways to verify the quality of waterproofing installations is through flood testing. Flood testing is a crucial step that can help identify potential leaks and weaknesses in the waterproofing system before they become costly problems. In this article, we will explore the benefits of flood testing and provide a step-by-step flood test procedure to ensure your waterproofing is up to the task.
FLOOD TEST PROCEDURE:
By incorporating flood testing into your waterproofing process, you can provide your clients with the peace of mind that their structures are well-protected against water damage. At Atech products PTY LTD , we adhere to the highest industry standards and promote the use of flood testing to ensure the effectiveness of our waterproofing solutions.
PRE INSPECTION
Conduct a thorough visual inspection of the waterproofing system, ensuring there are no visible defects, damage, or incomplete installations.
PREPARATION
Ensure that all drainage points, weepholes, and penetrations are sealed securely to prevent water from escaping during the flood test. Protect surrounding areas, such as internal timber flooring, from water exposure.
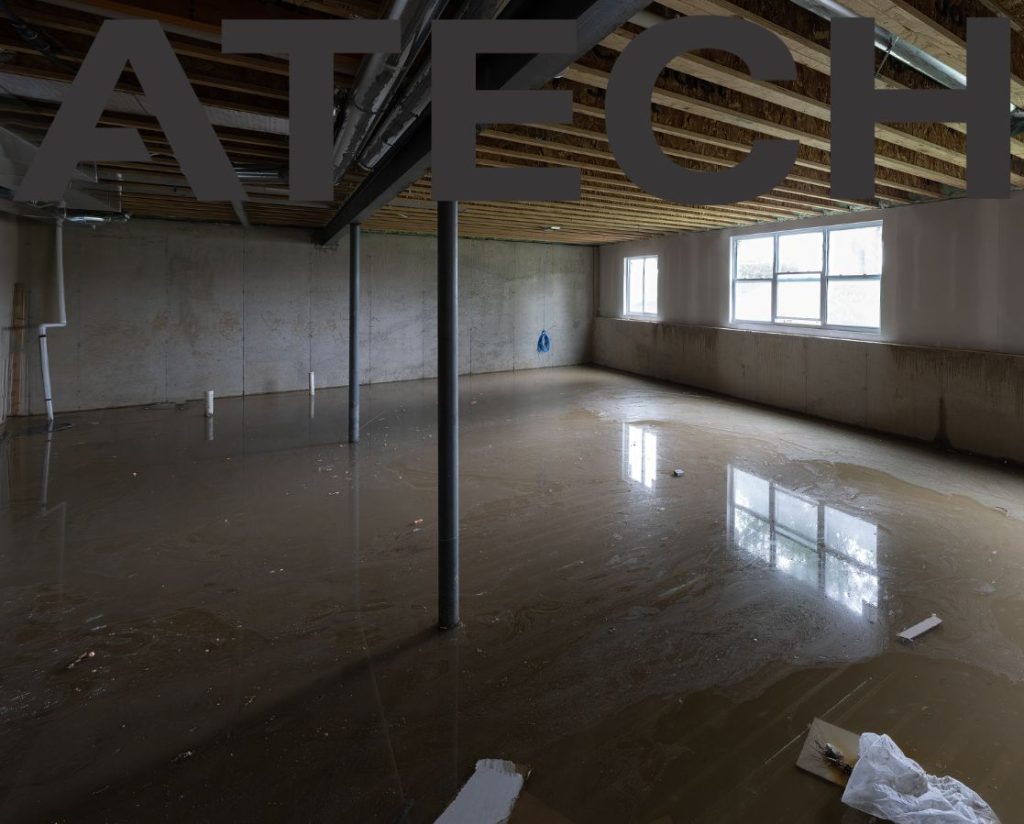
FLOOD TEST
Carefully fill the waterproofed area with water, maintaining a steady water level for an extended period (typically 24 to 72 hours).Monitor the area closely for any signs of water seepage or leaks during the test.
INSPECTION
After the flood test, thoroughly inspect the entire area for any signs of water ingress or weaknesses in the waterproofing system. Repair any identified defects or leaks immediately.
DOCUMENTATION
Document the flood test process, including the date, duration, and results of the test.
The Benefits of Flood Testing:

Early Detection
of Leaks
Flood testing allows you to detect leaks early on, before they cause extensive damage to the structure. By filling the area with water and closely monitoring for any signs of water seepage or leaks, you can quickly identify and address potential problem areas.
Quality
Assurance
Flood testing serves as a quality assurance measure, giving you confidence that your waterproofing system has been installed correctly and will perform as expected. This helps avoid costly rework and repairs down the line.
Compliance with
Standards
Many industry standards and building codes require flood testing for certain waterproofing applications. By conducting flood tests, you ensure compliance with these regulations and provide evidence of due diligence.
Long-Term
Durability
Properly installed and flood-tested waterproofing systems are more likely to have enhanced durability and longevity, protecting your structure against water damage and ensuring it remains in good condition for years to come.
STEP 1
PRE-INSPECTION
Conduct a thorough visual inspection of the waterproofing system, ensuring there are no visible defects, damage, or incomplete installations.
STEP 2
PREPARATION
Ensure that all drainage points, weepholes, and penetrations are sealed securely to prevent water from escaping during the flood test.
Protect surrounding areas, such as internal timber flooring, from water exposure.
STEP 3
FLOOD TEST
Carefully fill the waterproofed area with water, maintaining a steady water level for an extended period (typically 24 to 72 hours).
Monitor the area closely for any signs of water seepage or leaks during the test.
STEP 4
INSPECTION
After the flood test, thoroughly inspect the entire area for any signs of water ingress or weaknesses in the waterproofing system.
Repair any identified defects or leaks immediately.
STEP 5
DOCUMENTATION
Document the flood test process, including the date, duration, and results of the test.

STEP 02
PREPARATION
Ensure that all drainage points, weepholes, and penetrations are sealed securely to prevent water from escaping during the flood test.
Protect surrounding areas, such as internal timber flooring, from water exposure.

STEP 03
FLOOD TEST
Carefully fill the waterproofed area with water, maintaining a steady water level for an extended period (typically 24 to 72 hours).
Monitor the area closely for any signs of water seepage or leaks during the test.

STEP 04
INSPECTION
After the flood test, thoroughly inspect the entire area for any signs of water ingress or weaknesses in the waterproofing system.
Repair any identified defects or leaks immediately.

STEP 05
DOCUMENTATION
Document the flood test process, including the date, duration, and results of the test.
Keep records for future reference and compliance purposes.